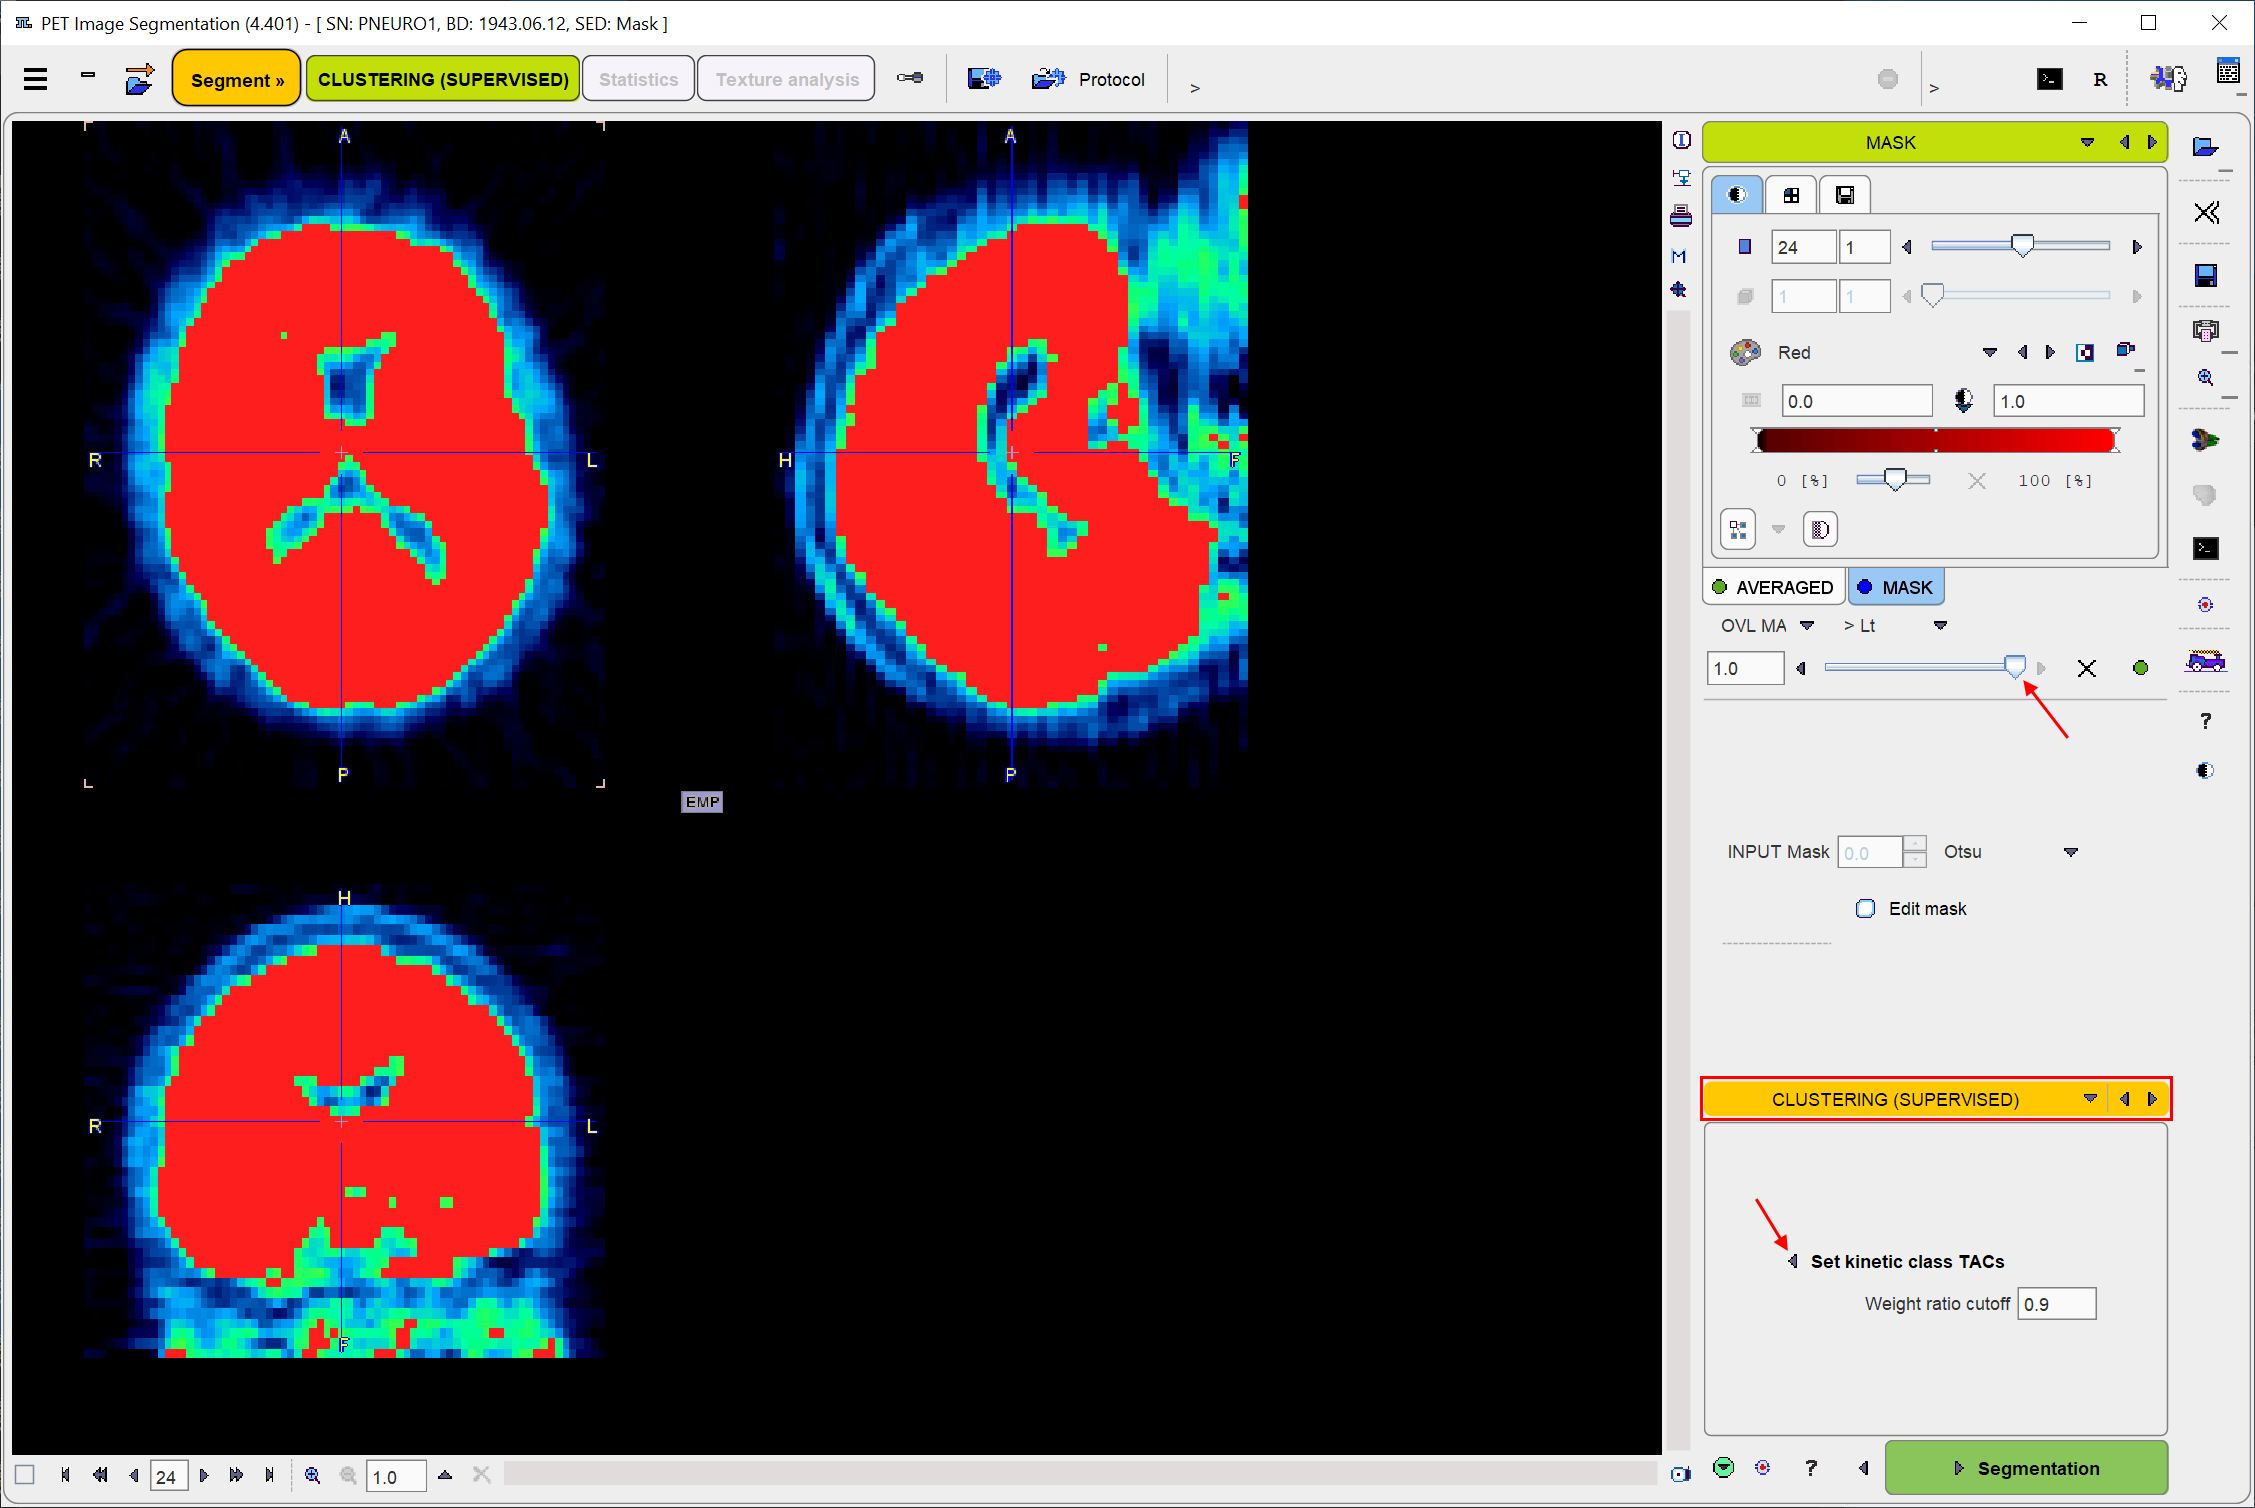
The mask shown on the MASK panel may be edited using Edit mask as described in a previous section.

Segmentation Method Selection
At this point, the CLUSTERING (SUPERVISED) segmentation method has to be selected in the lower right. The panel below the selection then shows the parameters to be configured, namely the kinetic class TACs as well as a Weight ratio cutoff.
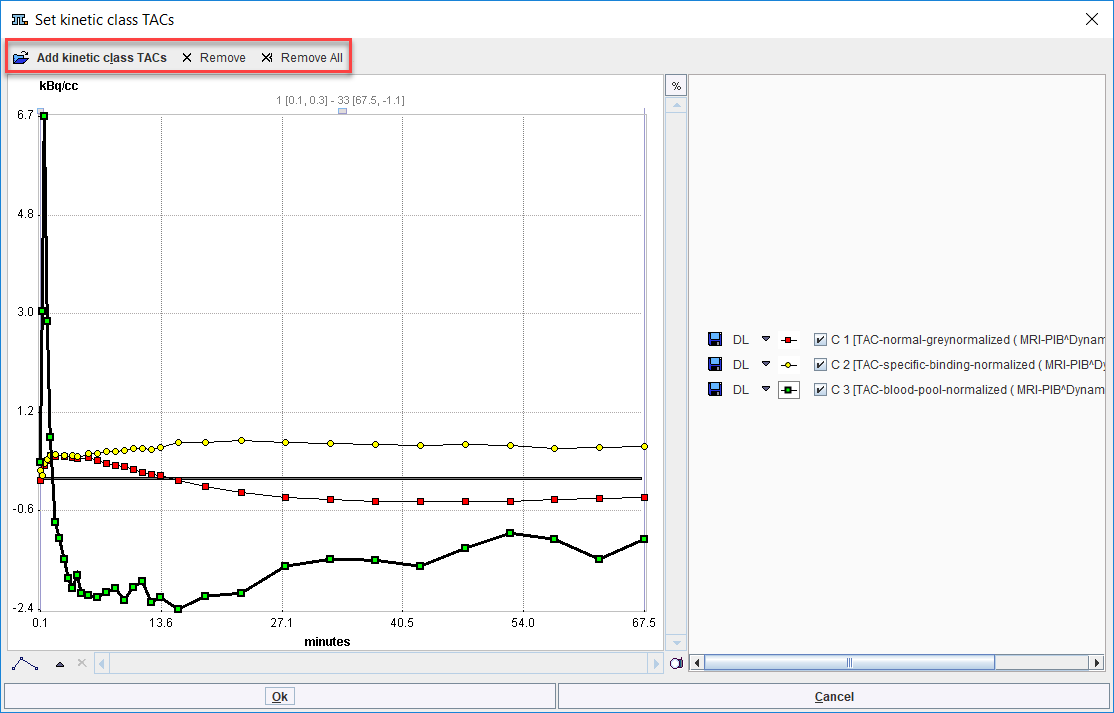
Use the Set kinetic class TACs button for opening a dialog window. There, use Add kinetic class TACs to select curves either from the database or from the file system. The curves are loaded and shown as illustrated below. Curves can incrementally be added. To discard a curve select it to the right and Remove, or Remove all.
In the illustration below C1 corresponds to normal grey matter, C2 to specific binding, and C3 to the blood pool similar to Fig. 1 in [9]. Note the normalized curve shapes which are very different from normal uptake TACs.

Segmentation starts the the classification procedure. For each pixel in the mask it finds the optimal linear combination of all kinetic class curves so that all coefficients are non-negative (NNLS, non-negative least squares). It then assigns the pixel to the class with the highest coefficient (or weight), if its ratio to the sum of all coefficients is greater than Weight ratio cutoff. Otherwise, the pixel is classified as background with a label value of zero. The segmentation result is shown on the SEGMENTS page.