Stepwise processing is started by selecting the Brain Atlas Adjustment page.
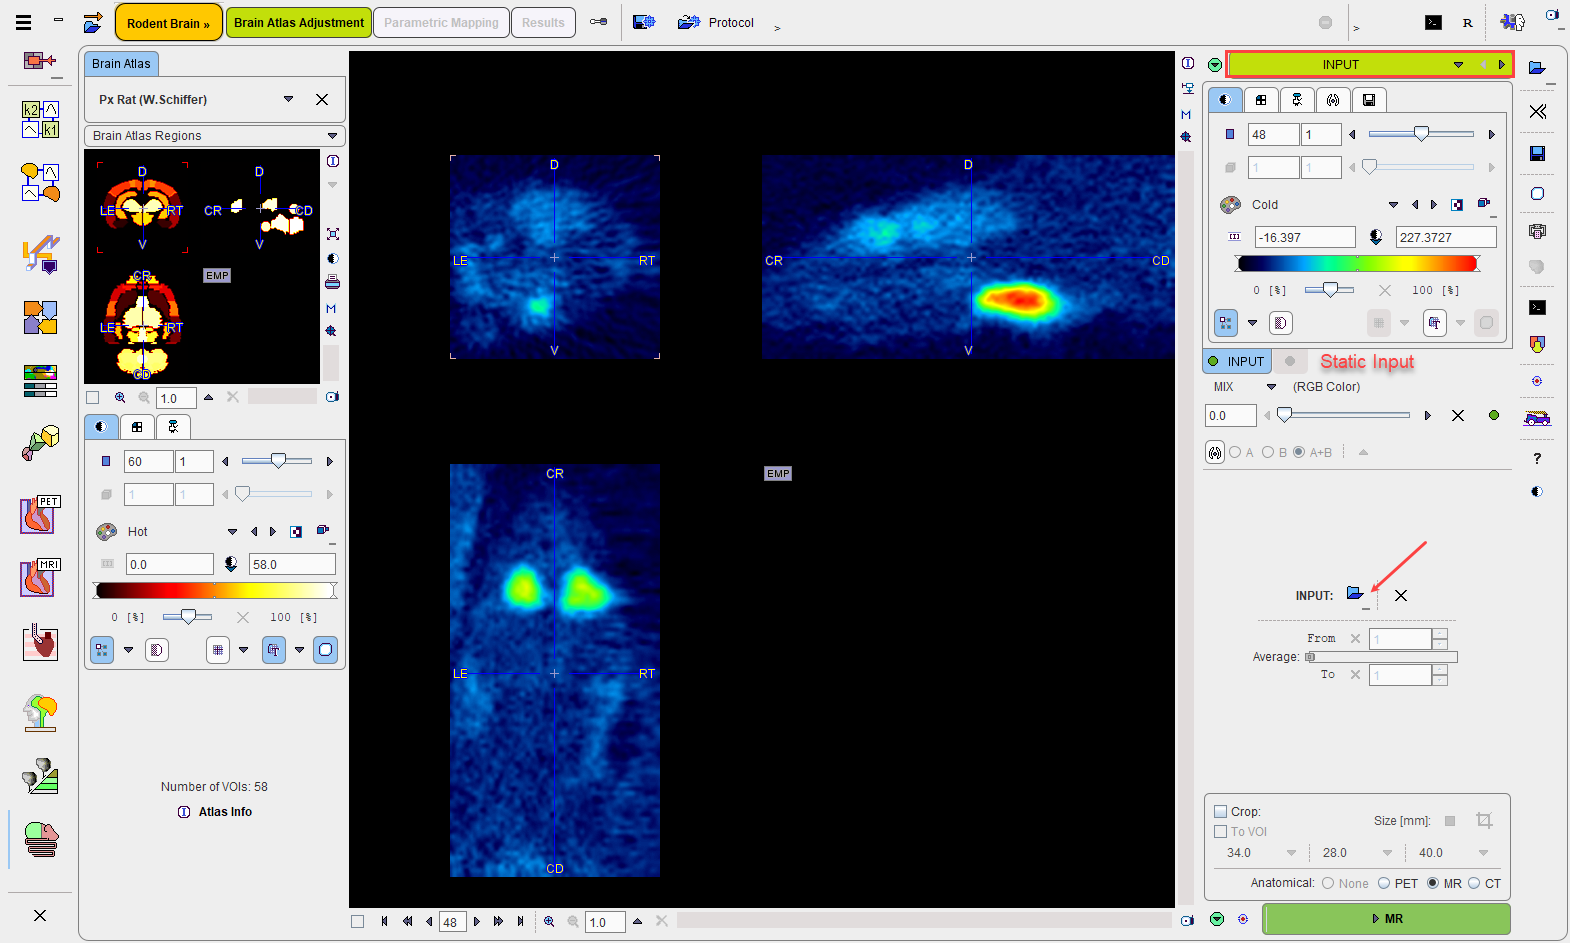
Static Input Image Loading
On the INPUT panel, use the Load INPUT button in the right control area for loading the Input image. As usual it is an option button which needs to be set to the appropriate data format with the indicated arrow. For loading images which are not saved in a PMOD database it is recommended to use the Autodetect loader.
The situation after loading a static Input image series is illustrated below. The appearance of the Input image is controlled by the elements on the INPUT tab.
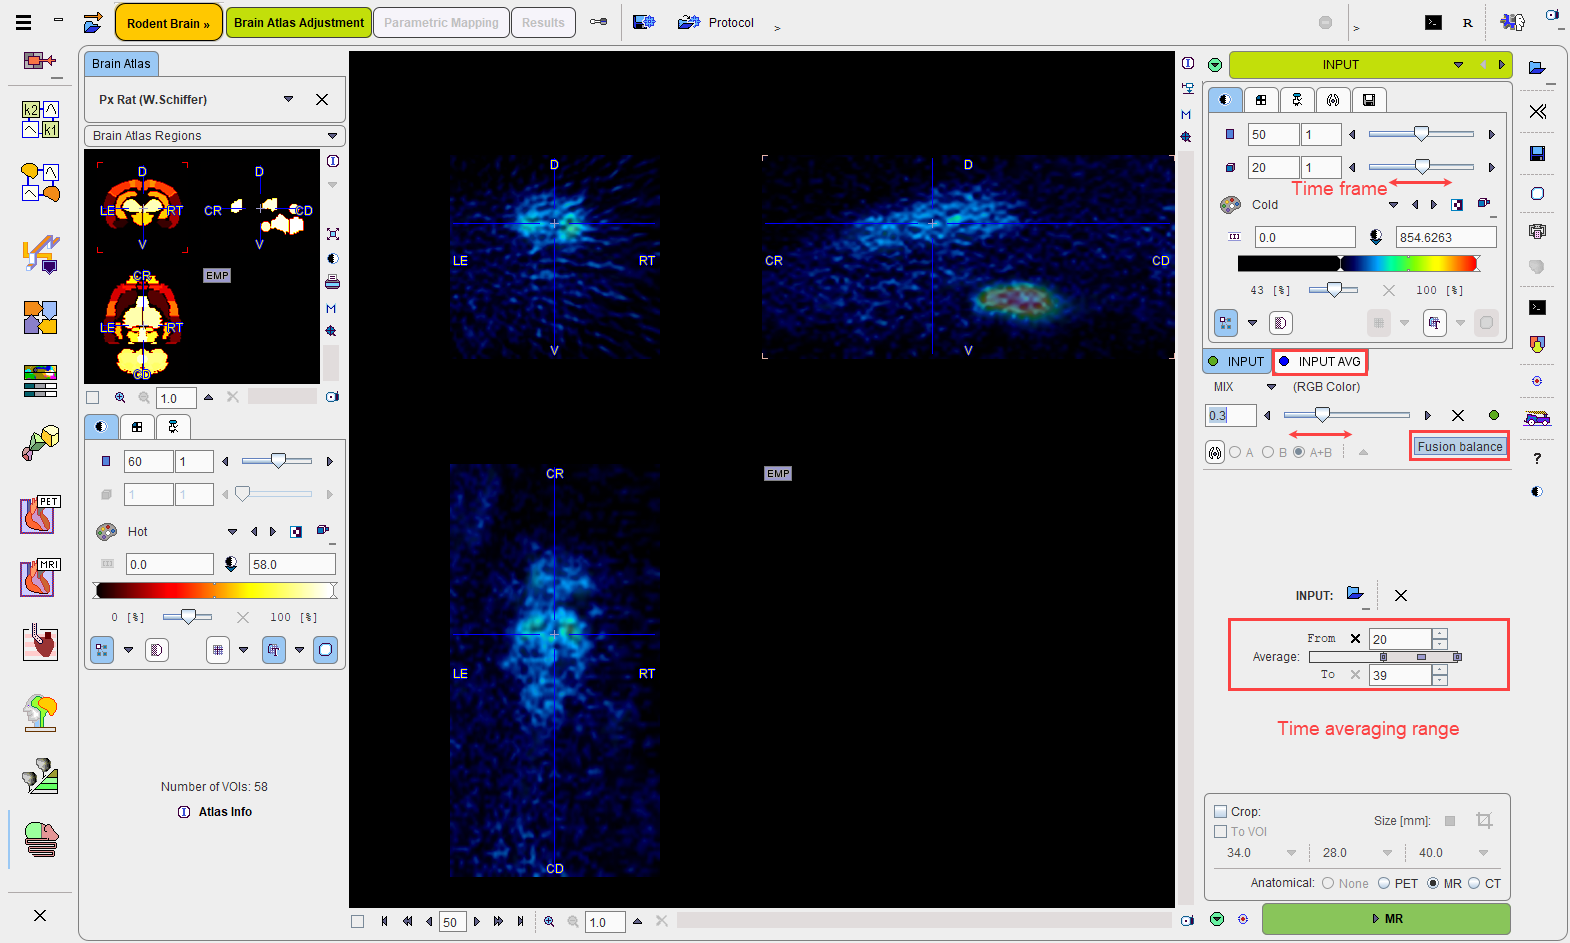
Dynamic Input Image Loading
In contrast, when loading a dynamic image, an additional image series is generated by averaging a range of time frames. The appearance of this series is controlled via the additional tab labeled INPUT AVG. The image display shows a Fusion of the original Input with INPUT AVG.
The averaging range can be defined by the From and To number fields, or dragging the range indicators in the Average bar. After any modification of the range, the average is recalculated and the display updated. The aim of the averaging is to generate an image with as detailed anatomy as possible for the rigid matching with the Anatomical image.
Input Image Cropping
If the field-of-view is larger than the brain, the image volume should be reduced to improve the reliability of processing. This can be achieved by enabling the Crop box and defining a crop box which appears as yellow rectangles in the image overlay.
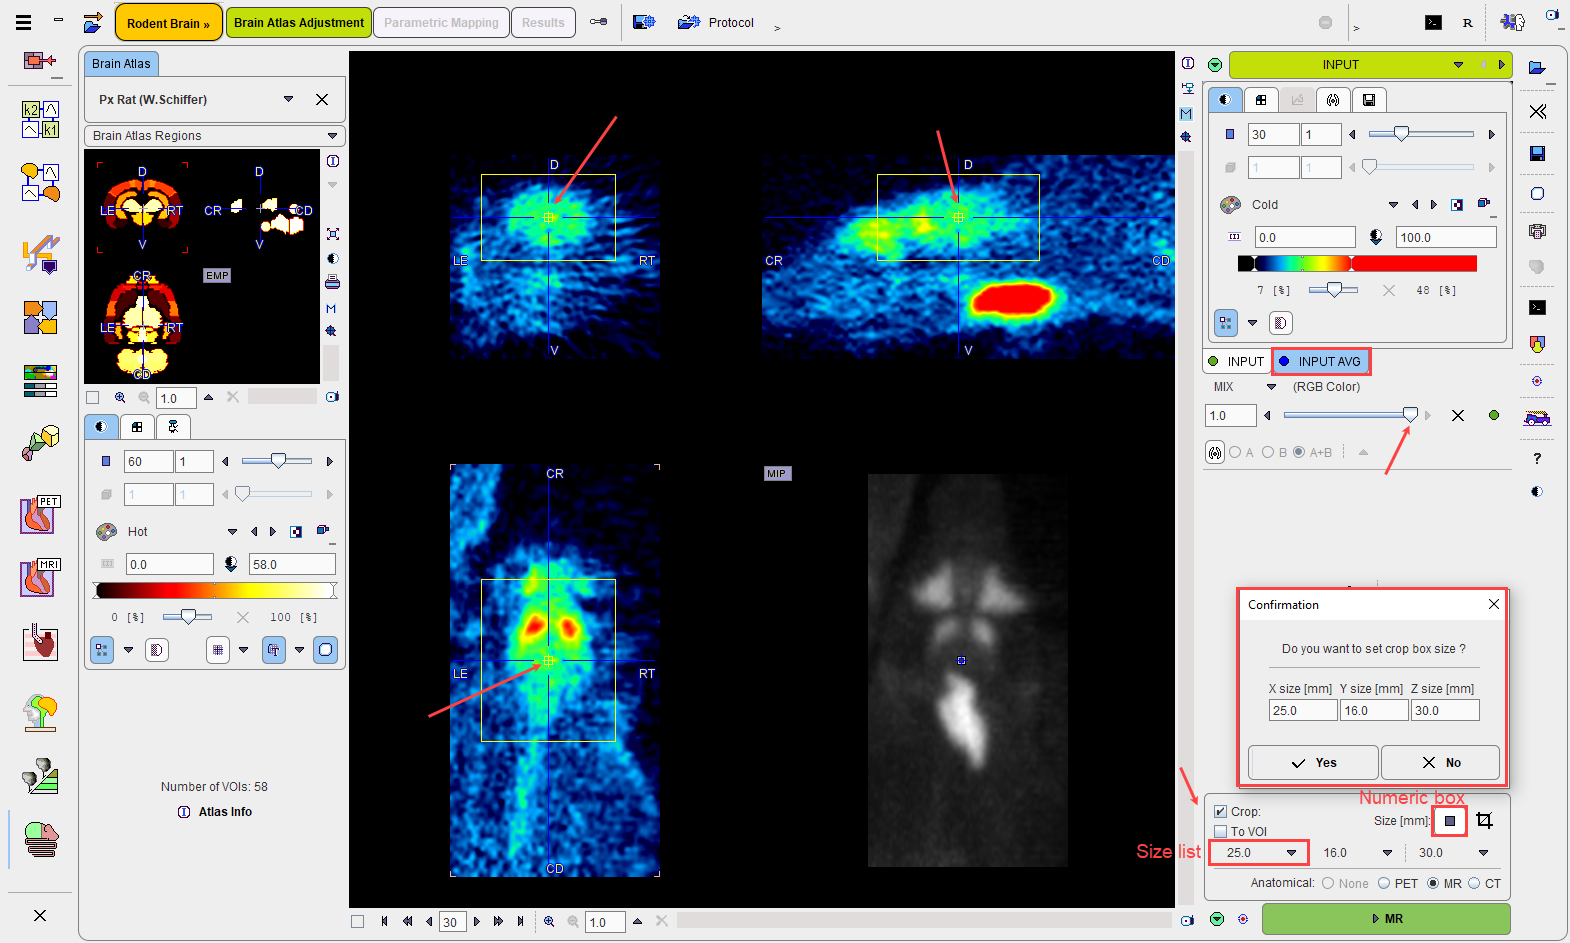
The size of the crop box can be changed by opening a configuration window for entering the three edge dimensions. Alternatively, the edge sizes can be modified using the size list elements which are available for the X, Y and Z dimensions.
The position of the crop box needs to be defined interactively by clicking into the image. The center of the crop box is placed at the clicking point. Place the crop box by clicking at the brain center so that the brain is fully enclosed. Depending on the template used, it may aid the normalization procedure if some neighboring tissue such as the Harderian glands are included.
Caution: The triangulation plane of the image can't be changed while the Crop box is enabled. Please disable the box to change the slice planes, and re-enable Crop again for positioning if needed.
The actual cropping can be performed on demand with the ![]() button. However, this is not necessary because when proceeding, cropping will automatically be applied. Note that cropping can only be performed once, thereafter it is disabled and the data needs to be loaded again for defining a different crop box.
button. However, this is not necessary because when proceeding, cropping will automatically be applied. Note that cropping can only be performed once, thereafter it is disabled and the data needs to be loaded again for defining a different crop box.
Anatomical Modality Specification
As a next step, set the Anatomical radio button according to the image which will be used for the atlas normalization, in the example MR. The label of the action button is changed accordingly.
![]()
Please activate the green MR action button to switch to the next layout for loading the Anatomical images.