If DICOM data are available on a disk (flash disk, DVD, hard disk), they can easily be sent to the DICOM server, which will add them to the Import database.
Start the unified data loader and select the DICOM tab. Use the Change Folder button to browse the file system to the directory where the data resides. If the data is organized as DICOM part 10 offline files, there will be a DICOMDIR file at the root of the directory tree which contains the image access information. Please Select this directory and the image series on the device will be listed as in the illustration below.
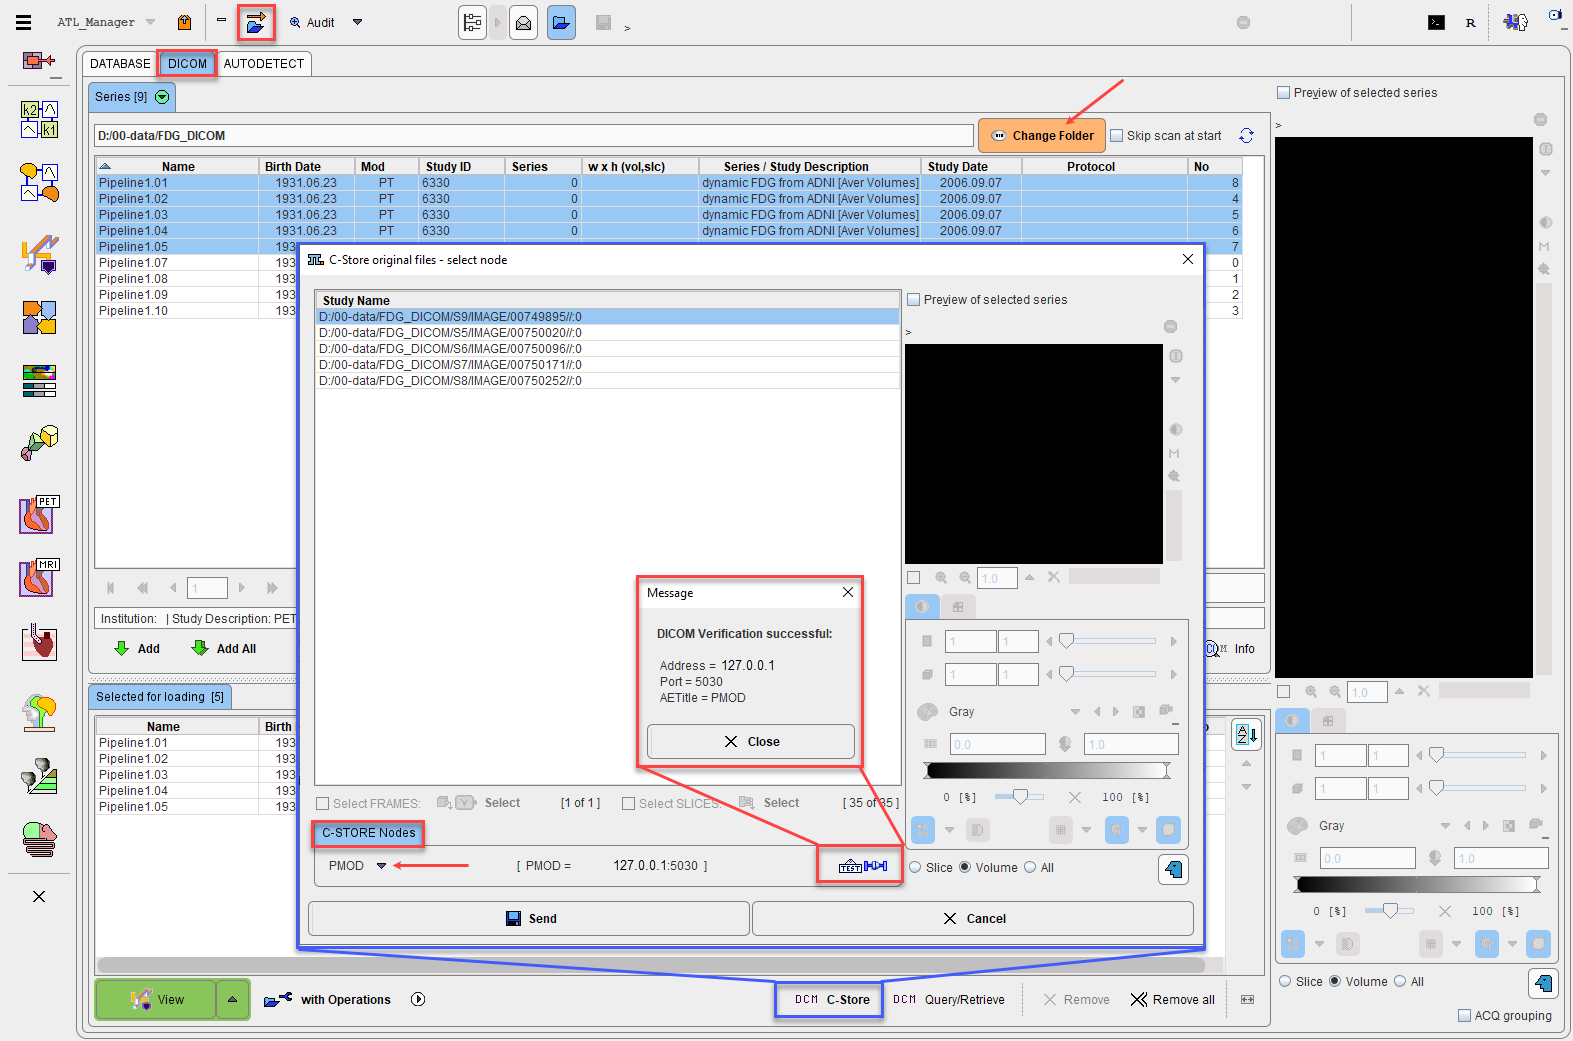
Select the image series you want to import in the list, and use the Add button to bring them to the Selected for loading area. Use the DCM C-Store button to initiate sending of the images to the DICOM server running on the ATL server machine. A dialog window appears for selecting the sending target which should equal the proper node.

Start sending the images with the Send button. After the acknowledgment of a successful transfer has appeared the images are available in the Import database.