The ATL_Manager will be in charge for moving the data from the Import database to the target study database, in the example below Study2. This task can be done in two ways. Note that all of these actions will be documented in the Audit log.
Moving Data in the Config Window (requires Administrator Password)
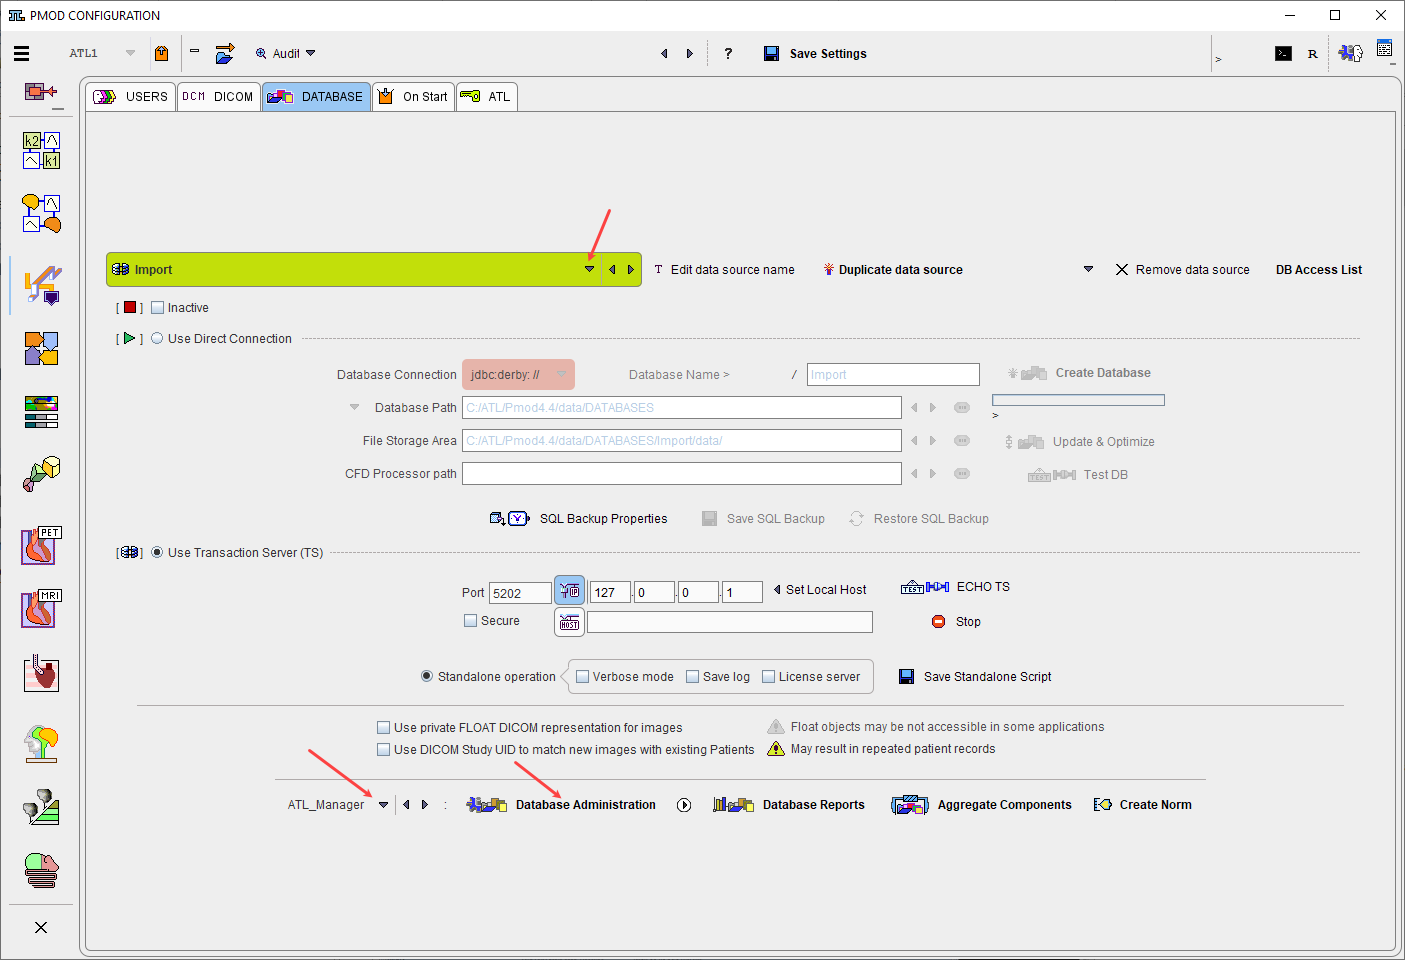
Start the Configuration utility and select the DATABASE tab. Make sure that the correct user ATL_Manager is selected, and activate the Database Administration button.

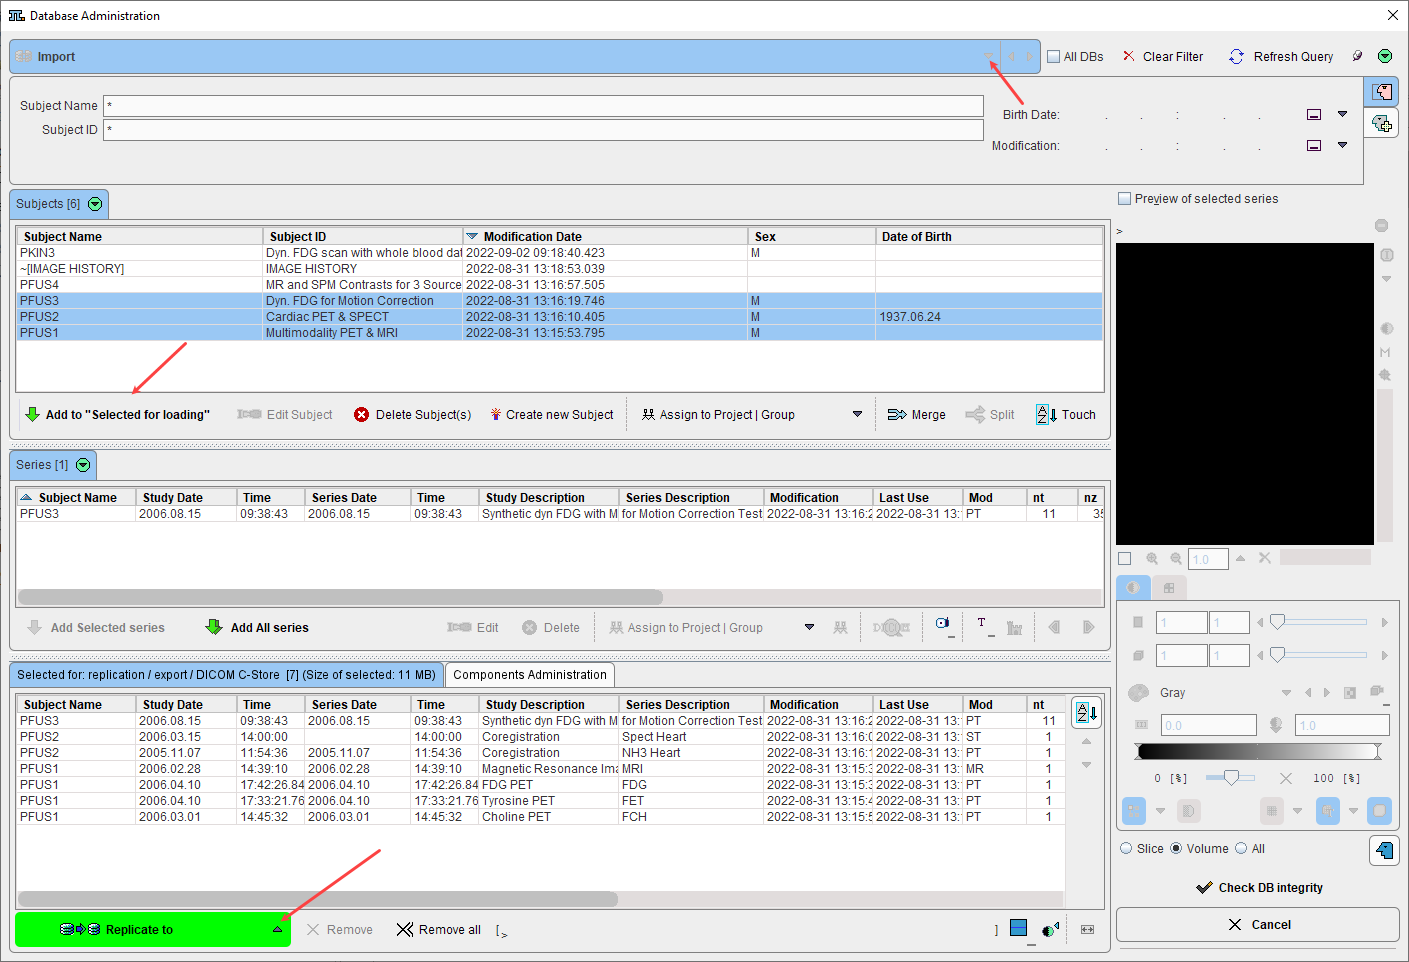
In the appearing Database Administration make sure that the Import database is selected. If it is not selected, activate the Components Administration tab, switch the database to Import, and the select the Selected for:/replication/ .. tab.
Then select the subjects to move to the Study2 database, and activate Set as "Selected for Loading". This brings all related images to the Selected for:/replication/ .. tab.

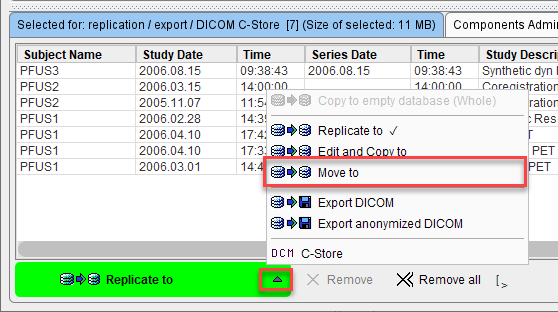
In order to remove the data after being copied switch Replicate to to Move to.

A dialog window appears for the specification of the target database. Make sure that the right Move to database is selected, and then migrate the data with the Move data button.

Replicating Data in the Viewing Tool
Data replication can also be done directly in the viewing tool PVIEW. There are two requirements: the database Load page is configured and that the user has access rights to both databases and that he is allowed to delete in the Import database.
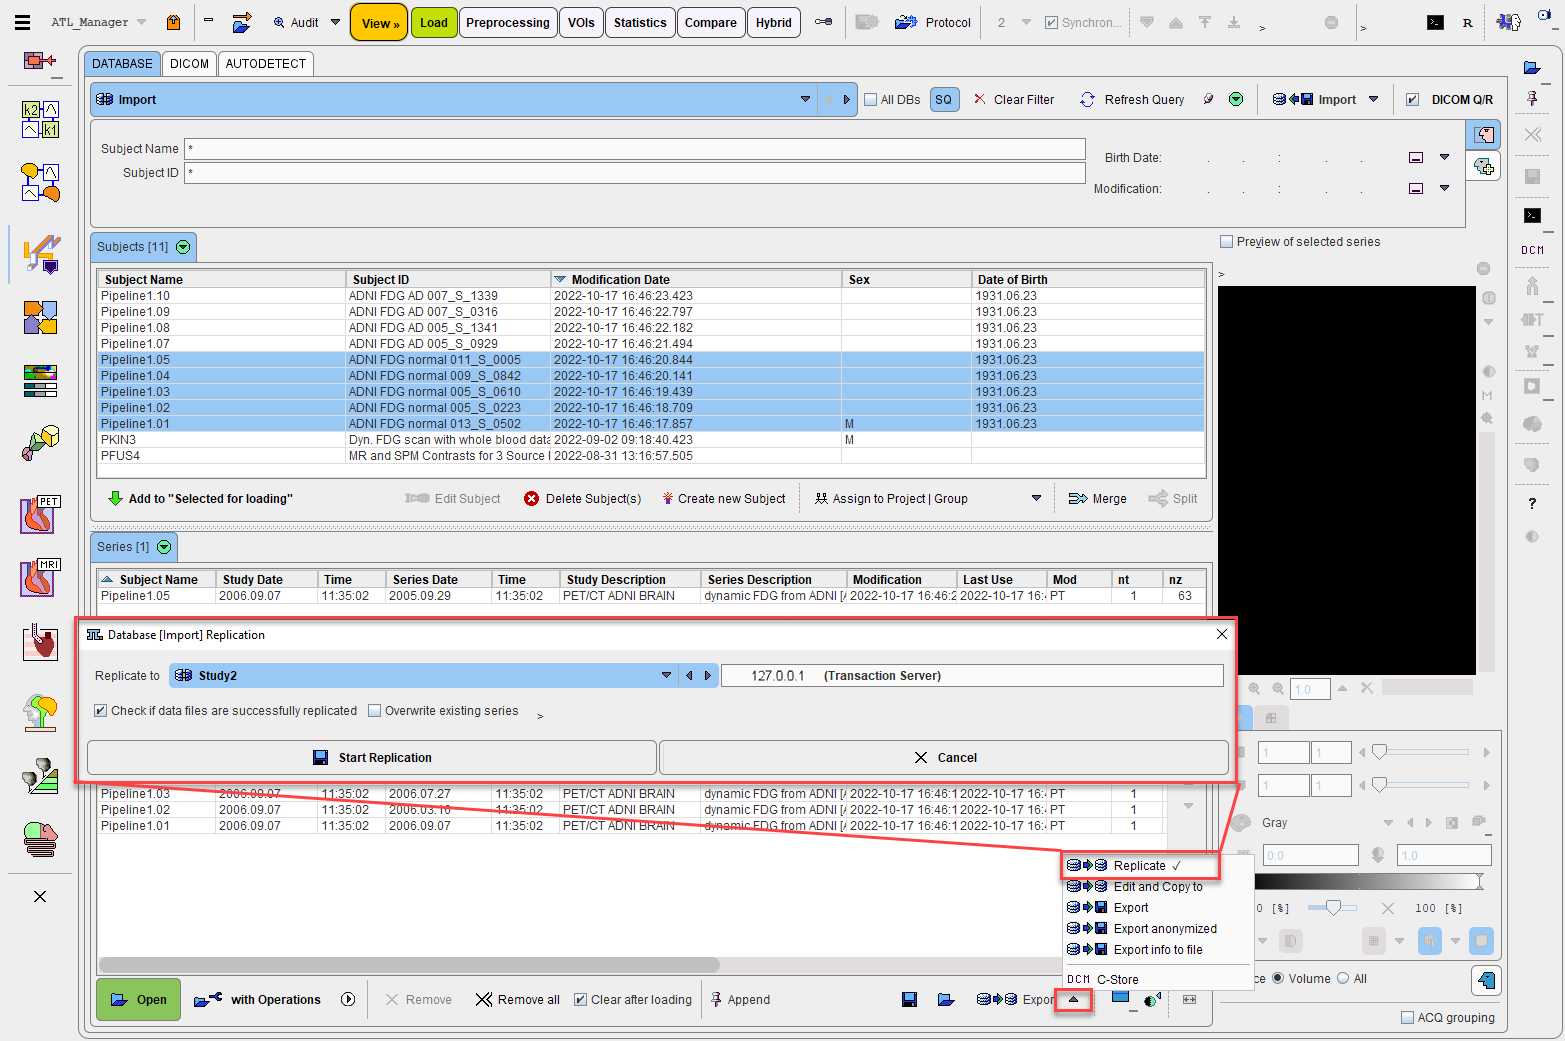
1.On the database Load page select the Import database
2.Select the subject(s) to move to the Study2 database.
3.Activate Add to "Selected for Loading" to prepare the images for replication.
4.Activate the Replicate button.
5.In the appearing Database[Import] Replication window select the target database Replicate to Study2 and Start Replication. The replication is confirmed.
6.To clean up remove the data from the Import database by the Delete Subject(s) button.
