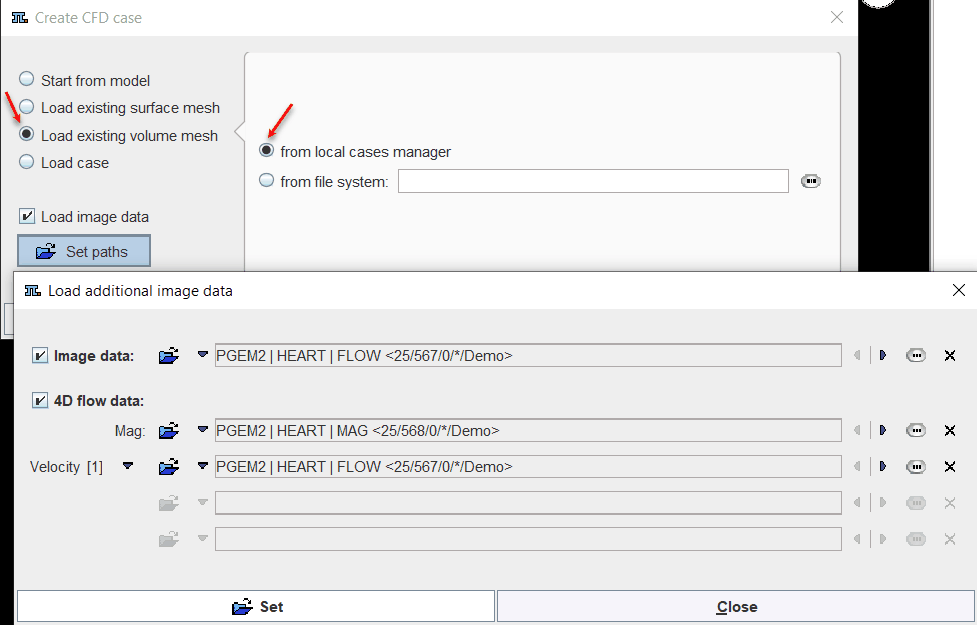
Start the CFD simulation activating the Create CFD case green button. A dialog window appears as illustrated below:

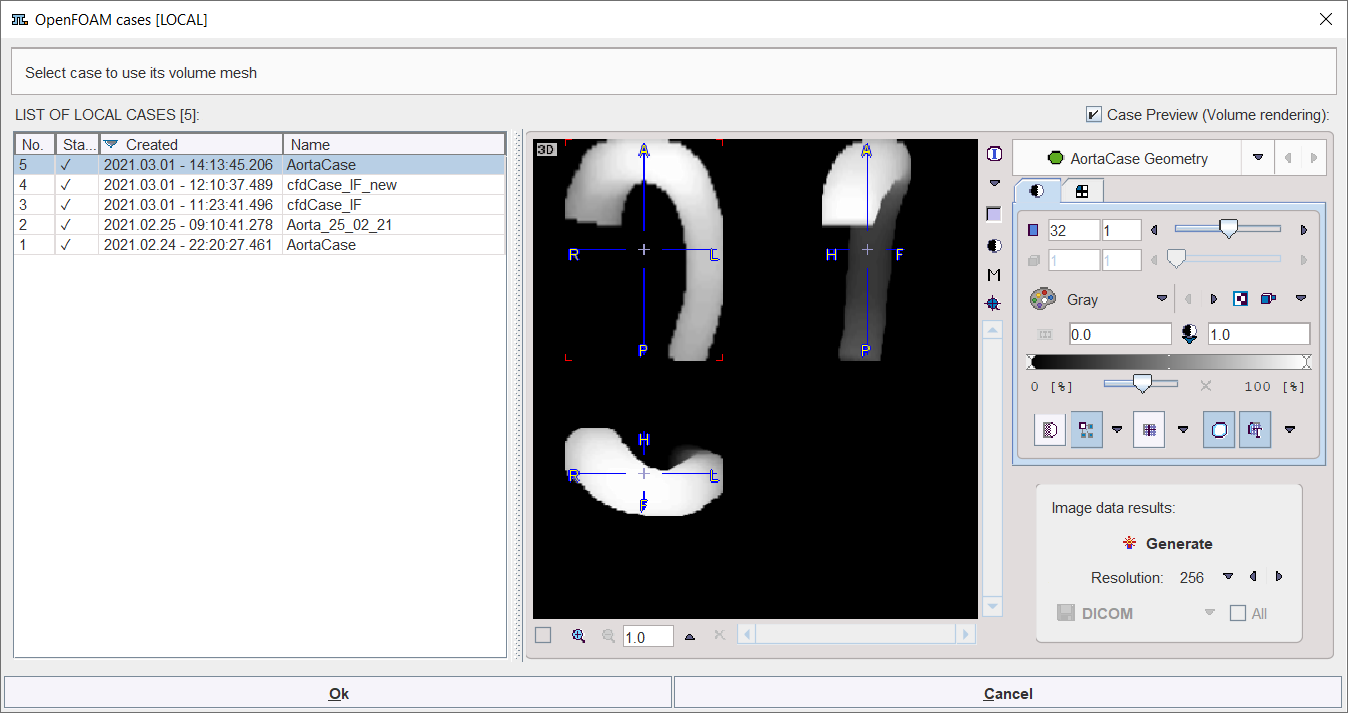
Toggle the Load existing volume mesh radio button to start the creation of the CFD case from a VM. Enable the from local cases manager radio button. The local cases are listed in a dialog window as illustrated below:

The left side shows the list of the available local cases. The list allows selecting one of the volume meshes for simulation. With the Case Preview box enabled, the selected VM is shown in the image port. The general image manipulation panel is available on the right hand side. It allows changing the appearance of the image in the viewport. The volume rendering displayed in the viewport can be saved as an image with the Save button.
With the Load image data box enabled it is possible to Set paths for velocity and magnitude image data. Close the dialog window with the Set button to confirm the images settings.
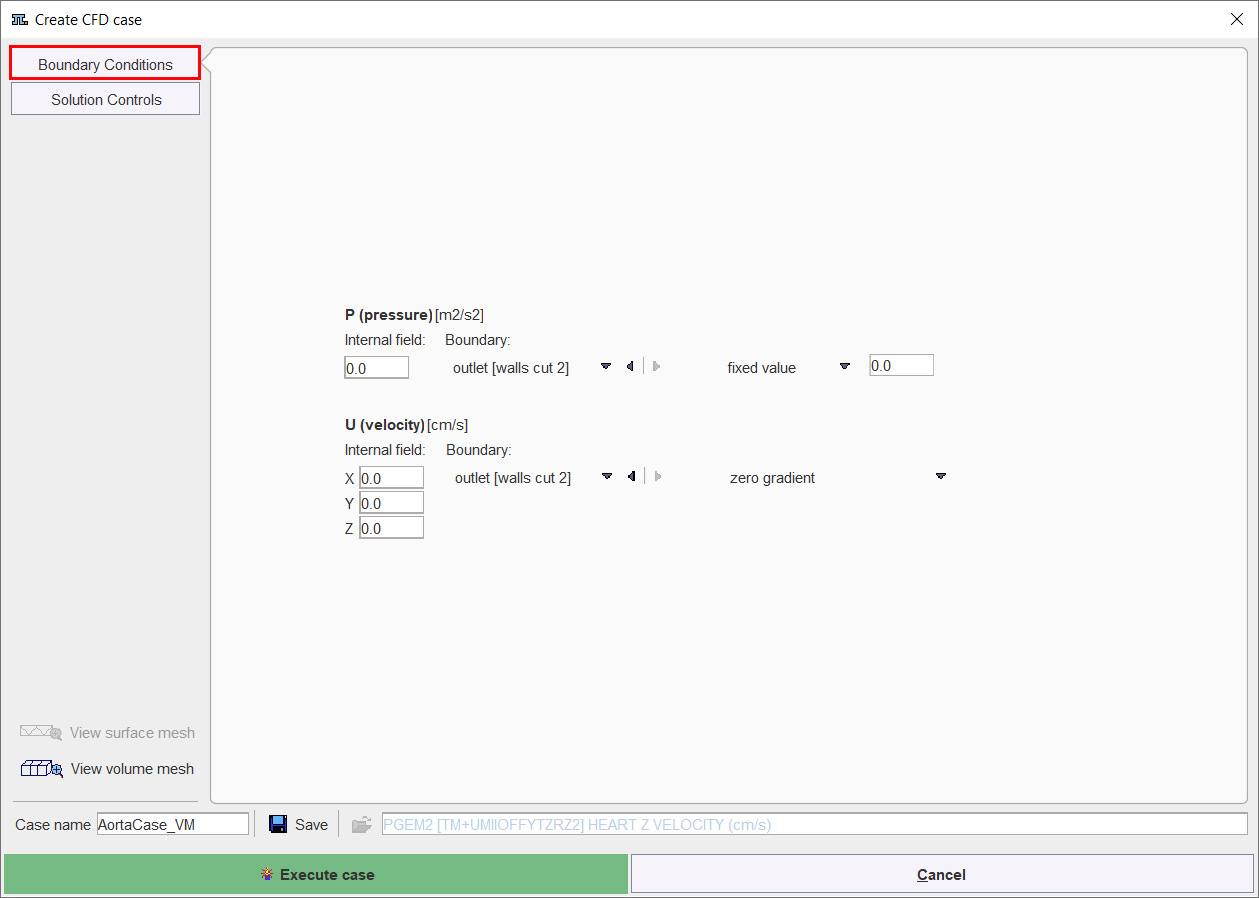
Activate the OK button to exit the window and continue with the creation of the CFD case. The interface is simplified as shown below:

It consists of the Boundary Conditions and the Solution Controls panels. Define the Boundary Conditions as explained previously. Finally, define the parameters for the solver. Set the number of iterations to a full tens number, e.g. 80 and enable the Get final results only box to save only the final solution for the simulation.
Note:
Assign a meaningful name to the CFD case in the Case name field. This facilitates the management of the OpenFoam remote and local cases.
The View volume mesh button allows viewing the VM in the 3D interface and interactively explore it.
Send the CFD case to the OpenFoam interface by activating the Execute case button.