Each of the study databases must be managed by a transaction server process. Please perform the following steps to define the transaction server and create a starting script for each database (in the example: Import, Study1, Study2).
1.Select the Import database in the data sources list.
2.Switch the radio button from Use JDBC connection to Use Transaction Server.

3.Configure the properties of the transaction server. The Secure box is for enabling secure communication. This mode should be used, if the communication is not confined within the institution. Otherwise it will slow down the communication speed unnecessarily.
4.An important property is the IP Port for the communication. It must be a unique number not used by any other transaction server or other process. As the default port of 5201 is already used by the transaction server for the audit trail, use the next free port 5202 for the Import server.
5.Another important property is the IP address. It contain the address of the server system which can be obtained by activating the Set Local Host button. Note that entering "localhost" in the HOST area will NOT work!
6.Activate Save Standalone Script. A dialog window appears which shows the contents of the created script. The script is dependent on the operating system. The example below is for a Windows system.
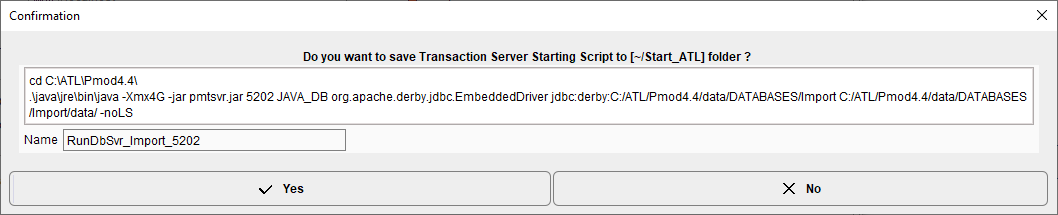
7.Select Yes to save the starting script with the specified Name in the subdirectory Start_ATL of the PMOD installation directory.
Repeat steps 1 to 7 for the Study1 and the Study2 databases using port 5203 for Study1 and port 5204 for Study2.
Note: Do NOT switch the radio button back to Use JDBC Connection.