The principle of protocol cloning is only directly applicable in the following scenario: the image data have been normalized to an atlas space, the model doesn't require blood data, and all involved curves are specified by a common set of VOIs in the atlas space.
Association of Data Elements to Input Data
Otherwise, all data elements which are required for modeling a specific input image have to be related to it in a process called "association". Association can be done from any database interface, for instance in the PVIEW tool.
To associate data elements to an image first select it in the image Series list, then activate the arrow button indicated below and select the appropriate association entry. The highlighted elements in the appearing list correspond to the blood processing (BP) or model preprocessing (MP) step in PXMOD. CRV indicates specification as a curve, as opposed to a VOI specification.
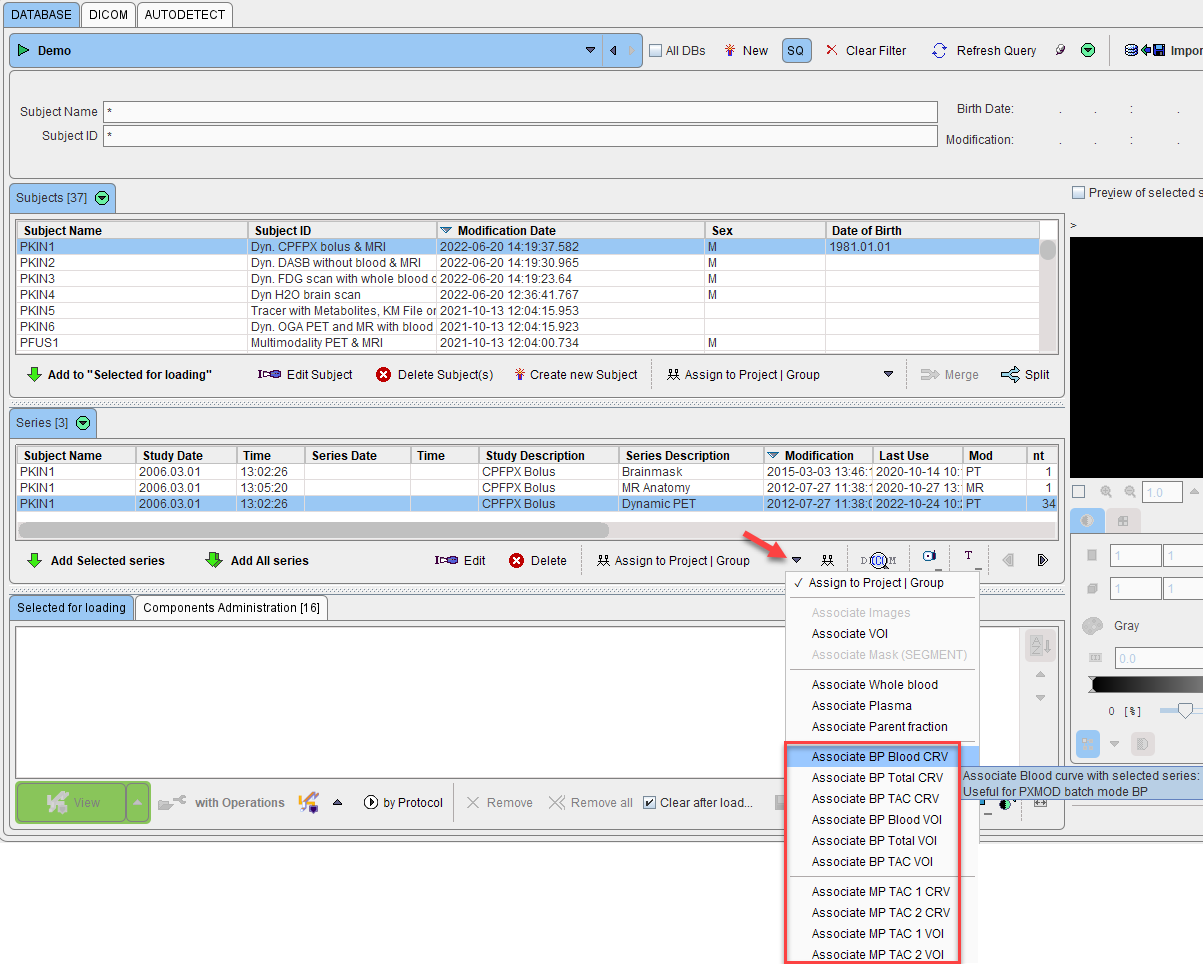
The non-image data elements for PXMOD include:
•Blood preprocessing: input curve (BP Blood), whole blood curve (BP Total), tissue TAC to be fitted (TAC)
•Model preprocessing: target tissue (TAC 1), reference tissue (TAC 2)
To associate the mask file, please first select the input image, then the mask file, and finally select Associate Mask (SEGMENT) from the association list.
Inspection of the Association
What information is associated to an image can be inspected by selecting first the image in the Series list, and then the "pair" button illustrated below. Note that the association type can still be changed using the Set series TAGGING selection.
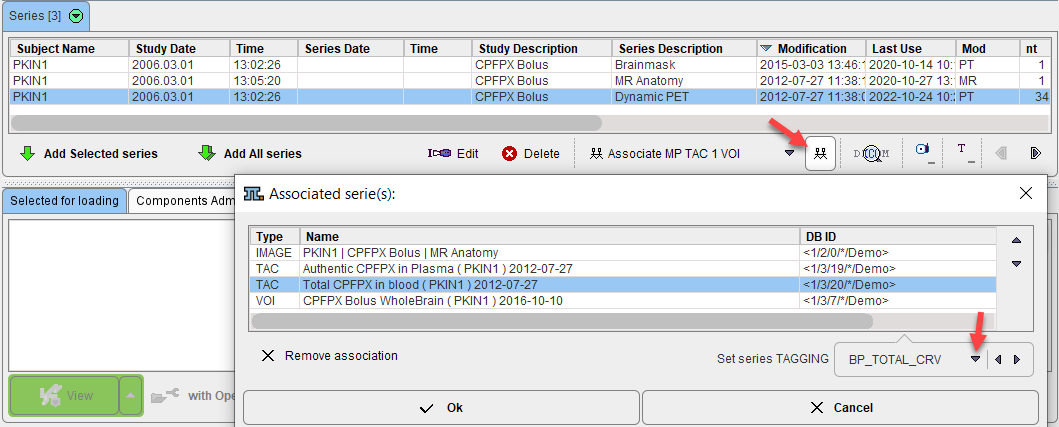
In the example above the blood data and the VOI for the target tissue have been associated to the image, so a full data set has been prepared for the blood-based PET models in PXMOD.
Protocol Cloning
Once all data sets have been prepared with the required associations, protocol cloning can be applied. Start batch processing and select the protocol which serves as the template. Check the information which is shown in the parameter area, particularly whether the Parameters output path. is properly specified. If needed, use the View/Edit Details button to open the parameters editor and change as required.

Next, activate Clone protocols. In the appearing window use the Set files button to open a window for selecting the input images, for which the template should be cloned.
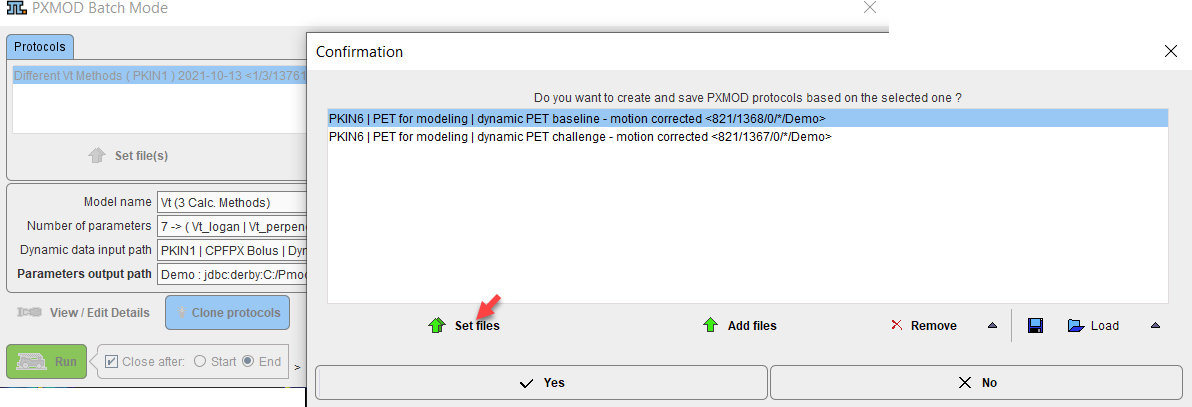
After closing the window with Yes the batch window is updated and shows one entry for each of the selected input images.
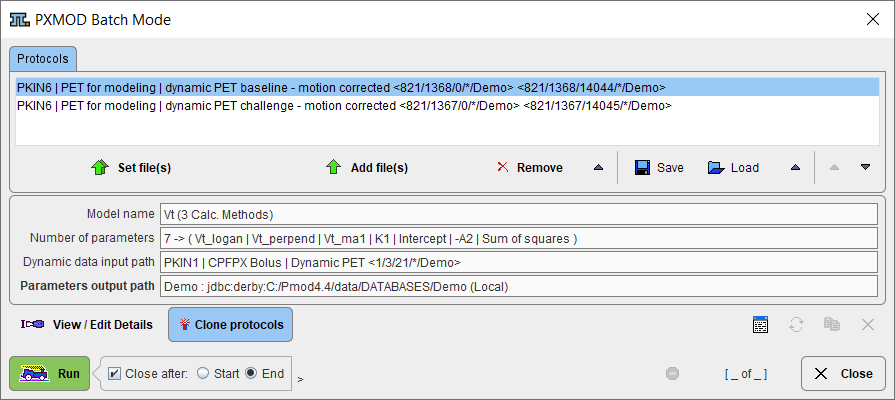
In fact, each entry corresponds to a protocol file which has been created by the cloning process, and which will be sequentially processed when Run is activated.