CoReg Image Panel
As soon as input images have been loaded and resliced, they are fused with the reference images and shown in the lower left image area.
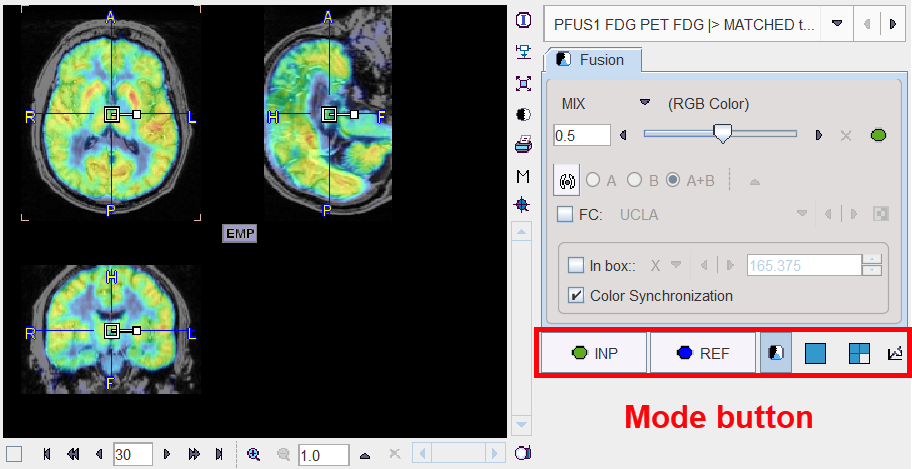
Note the row of mode buttons to quickly change the upper part of the control area.
|
Button to show the image controls of the reference images. Then the color or the image layout can be adjusted. |
|
Button to show the image controls of the currently selected reslice images. |
|
Show the image fusion controls as in the example above, so that the fusion rendering can be adjusted. |
|
Switch to single plane layout. |
|
Switch to orthogonal planes layout. |
|
Button to activate the reslice panel on the input images. At the same time the reslicing controls are also shown, allowing to interactively move/rotate the images. |
The available methods for image fusion are explained in detail below.
The Color Synchronization check box in the Fusion controls pane allows linking the color tables of the fused images in the CoReg area with that of the original the Reference and Input images.
The match In box facility allows limiting the automatic calculation to a box. Calculations will be performed only for the reference pixels included within the box. Unlike the masking, the In box procedure reduces memory requirements. The box can be rescaled in the CoReg area in the Fusion controls pane: select the Direction (X, Y, Z) and enter the corresponding dimension in the textbox. Once the box dimensions are defined, the automatic calculation can be started:
▪in case of the Rigid Matching algorithm the transformation is applied to the whole image.
▪in case of the Brain Normalization, the affine step is applied to the whole image while the warping effects outside the box are limited. Note that when calculating the inverse transformation for the normalization the box is not considered.
NOTE:
Data masking (described above) and the In box methods do not guarantee a successful automatic matching. Both methods limit the calculation to a certain area. Thus, pixels that have little relevance or can disturb the automatic procedure (e.g. structures or changes visible only in one of the images) are excluded from the calculations.
When the box and mask are enabled simultaneously, both are used during the calculations. The box is applied first, therefore, if the box is completely enclosed in the area of the Reference mask, the mask will have no effect on the calculations as all the pixels within the box are also within the mask.
Masking and In box calculations are not supported for principal axes method.
All matching activities will update the images in the CoReg area. So if an automatic matching is applied starting from a certain initialization, and then the outcome is manually refined, the result images are available in CoReg.
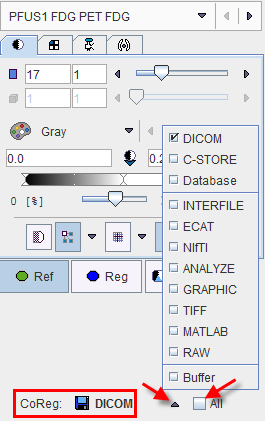
Result Image Saving
To save the matching result images, use the saving button indicated below. Note the All check box. If it is enabled at the time of saving, all reslice series will be saved at once. The saving format can be adjusted using the usual arrow button. An alternative for saving the currently selected reslice images is using the save button in the taskbar.