After the template has been loaded as the Reference and the study to be spatially normalized as the Reslice, activate the Brain Normalization button. A dialog window appears for configuring the processing.
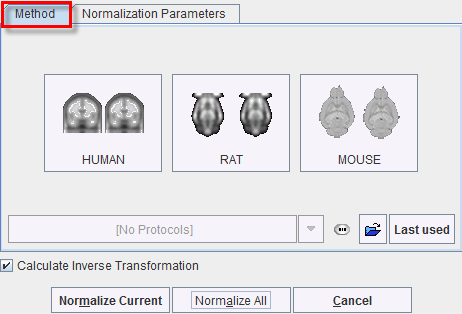
There are buttons in the Method pane to establish proper parameter presets for certain tasks, particularly for processing HUMAN,RAT or MOUSE data. Activating one of the buttons displays the Normalization Parameters pane with appropriately configured settings. The Last used button restores the parameter configuration of the latest Brain Normalization invocation, and the list selection allows retrieving special purpose parameter sets.
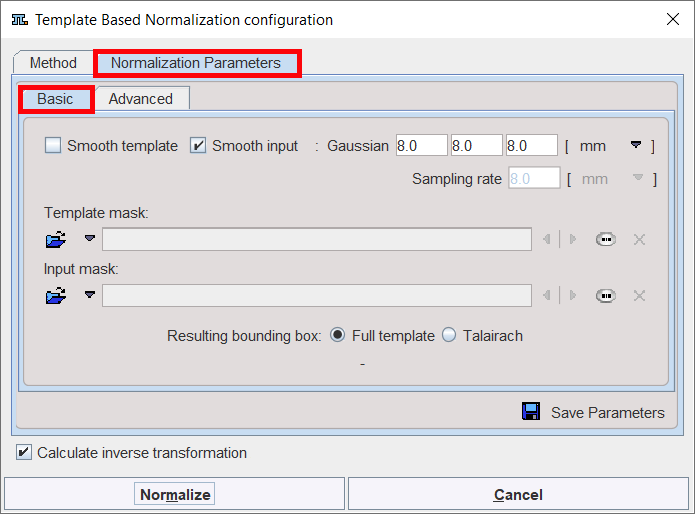
There are Basic and Advanced parameters on separate tabs.
The settings available in the panels allow fine-tuning the basic procedure.
Basic Parameters
Smooth atlas, |
If either box is checked, an initial Gaussian smoothing of the respective data is performed. Both smoothing operations use the same configurable parameters. Usually, the atlas has already been smoothed beforehand so its smoothing is not required for the normalization. |
Calculations sampling rate |
The sampling rate of the method is derived from the Smooth Input filter size. If no smoothing is applied, the sampling rate needs to be specified by the user. |
Template Mask |
This section is needed for defining a mask to be applied during the normalization procedure. ▪MNI brain template (HFS): a MNI brain template with HFS orientation was loaded. With this selection the standard Mask is used, so there is no need to define it. ▪MNI brain template (HFP): a MNI brain template was loaded as is, appearing as HFP. The corresponding standard mask is used. ▪Other: Use this selection if you have loaded your own dedicated template using the load Reference button, or using the User defined File menu entry. In this case, you need to select a file corresponding to the template which restricts normalization to the meaningful area. |
Input Mask |
This option allows defining a mask to be applied during the normalization procedure. You need to select a file corresponding to the Input image which restricts normalization to the meaningful area. To discard the mask activate the Clear file or directory button |
Resulting bounding box |
The radio box selection allows defining the extent (bounding box) of the resulting normalized images. ▪Full atlas: the result image has the size of the used template. ▪Talairach: the result image is trimmed to the bounding box of the Talairach brain atlas as in the SPM programs. |
Advanced Parameters
The Advanced parameters are usually only changed if a normalization fails or if the user aims at a specific effect.
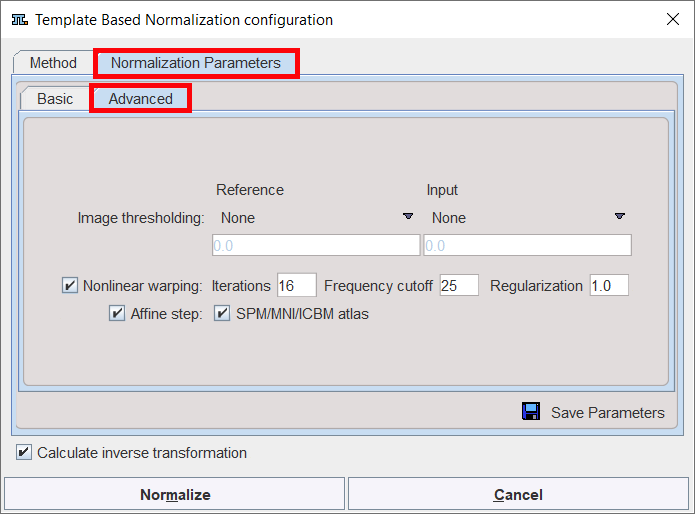
Thresholding method |
The image volume considered during matching can be restricted to a sub-volume by thresholding, eg. by excluding the image background. Absolute values can be defined when User defined option is selected as thresholding method. |
Nonlinear |
If this box is not checked, only the affine (translation, rotation, scaling, shearing) part of the normalization is performed. |
Iterations |
Number of nonlinear iterations. The higher the iterations number, the more deformations may occur. |
Frequency cutoff |
The specified Frequency cutoff (default = 25) is used together with the Bounding box size to calculate the number of basis functions. Higher cutoff values result in fewer basis functions. |
Starting the Normalization
The Normalize Current button (or Normalize if only one Reslice series was loaded) starts the normalization process of the current Reslice series with the given settings. A bar will appear in the status line which indicates the normalization progress. With Normalize All all Reslice series are sequentially normalized.