After images have been loaded, the user can switch to the parallel image viewing page by selecting the Compare tab. PVIEW now shows three horizontal image display layouts. There are two display modes available, regular image display, and image fusion.
Regular Image Display Mode
The example below illustrates the regular image display mode, whereby each of the studies may have an independent layout. Note the Synchronize (for Synchronize compare display 1,2,3) and Color boxes highlighted in red. If they are checked, PVIEW switches all three rows to the same layout and synchronizes the images shown. This will only be successful for studies which have the origin at the same location and which cover the same image volume (the pixel size, however, might differ as in the case of a PET/CT study with the same reconstructed field-of-view).

Image Fusion Display Mode
In the fusion display mode the studies in the upper two rows are synchronized, while the third row shows the fusion image. As for synchronized image comparison, the studies must have the origin at the same location and cover the same image volume.
A PET/CT example is shown below.

In the fusion mode all fusion renderings are available to prepare a meaningful fusion image.
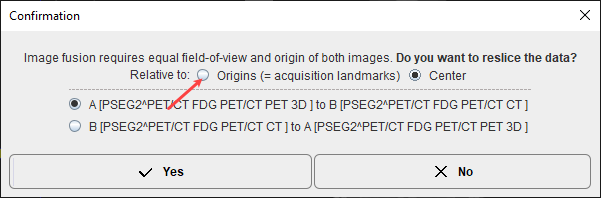
The manual rigid matching procedure is available with the fusion modality set. To adjust the alignment of the two images by rotation and translation the reslicing pane need to be activated in the second row. Reslicing is defined by a transformation consisting of translations in all directions, rotations about all axes, and potentially scaling along the axes. Each of these transformation components has its own sub-pane: Move, Rotate and Scale respectively. See further details here.
Additionally, by activating the Hybrid tab it is possible to bring up a larger display of the active fusion image.
Fused Image Saving
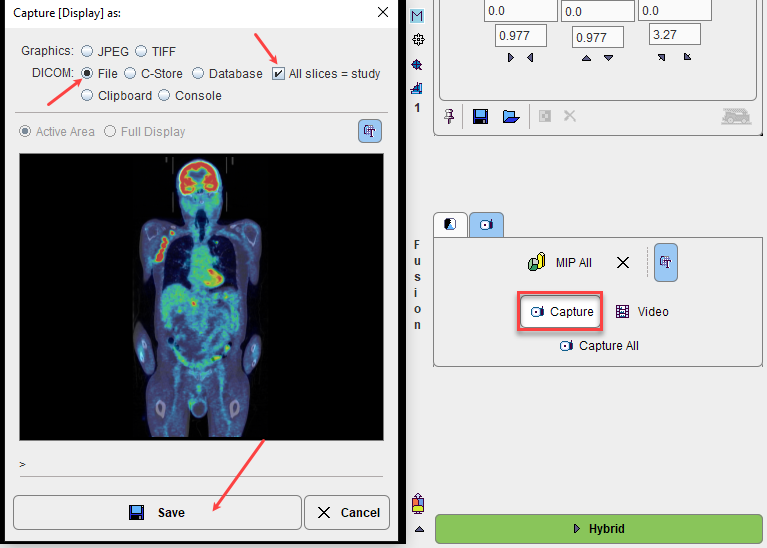
The fused images can also be saved using the Capture button on the Capture panel. A dialog window appears for defining the format of the RGB images.
The DICOM output is of particular interest because with the All slices option it can create a full volume of fused images which can be saved for archival in a PACS system and inspected with any reviewing workstation. With the File the DICOM SC images are saved to disk, whereas the C-Store option supports direct network transfer to a DICOM server.
Switching the Display Mode
The display modes can be switched using the button close to the right lower corner, which changes according to the situation.
|
Selects the image fusion mode. |
|
Selects the regular image display mode with independent series. |
|
Sets the third row to blank. |